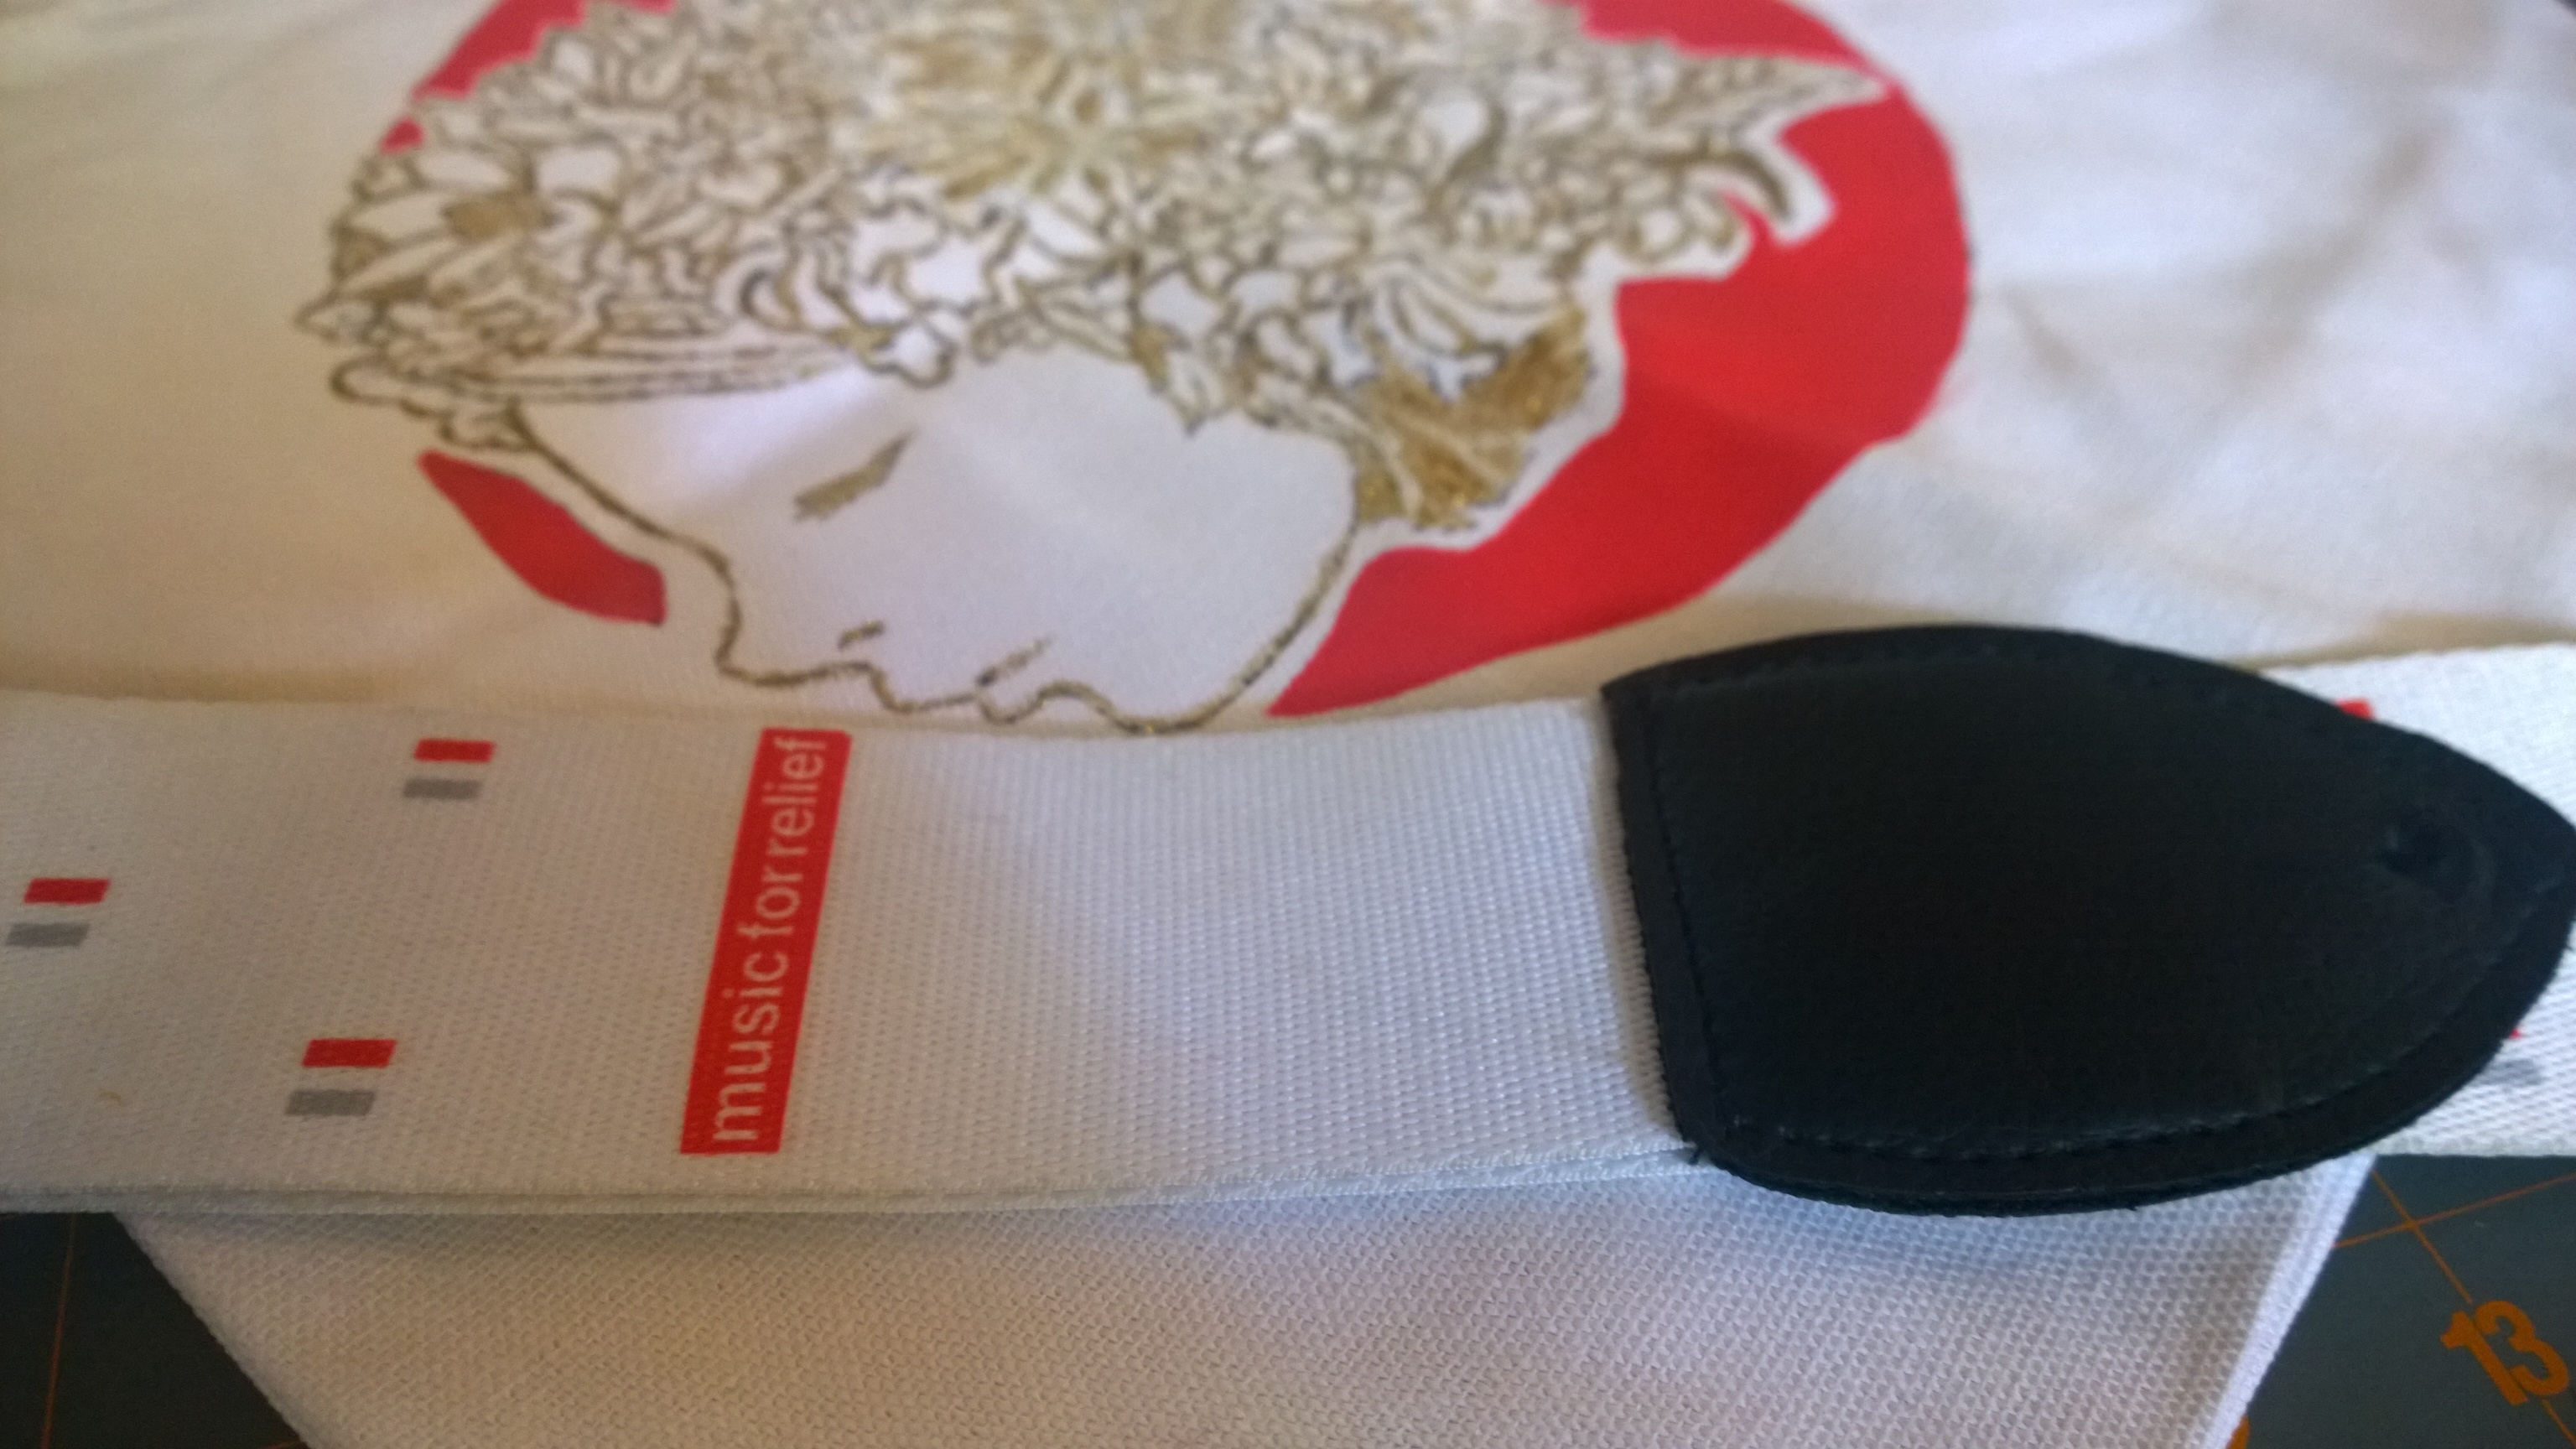
I first saw the new Music for Relief guitar strap at the iHeart Radio Listening Party for The Hunting Party (so much partying!). Finding myself Stage Left for probably the third time ever, we got to see the new strap rocked by Phoenix and his bass. It just became a matter of waiting once we saw it, and of course, they were released during Music for Relief’s online store launch after MusicForRelief.org got a makeover.
Just how I try to support the band no matter what they bring out, I try to support Music for Relief in any way- including buying a guitar strap even though I don’t have any instrument aside from my air drums. So, the plan was to just hang it somewhere in my room. Once I did, though, I felt like the support was done, over with; and Music for Relief strives on endless support.
So with no guitar or bass, the only other thing I could picture at the end of those straps was a bag.
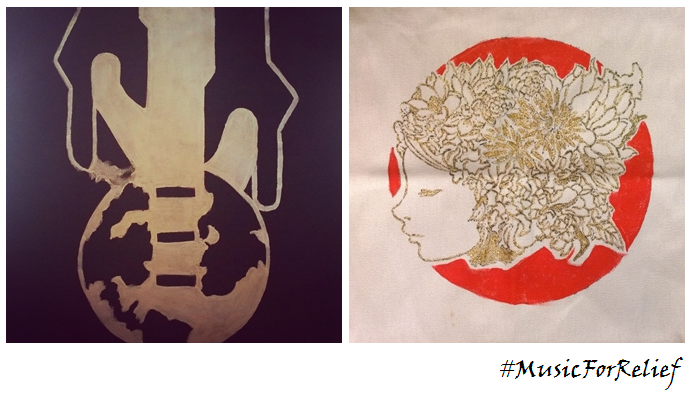
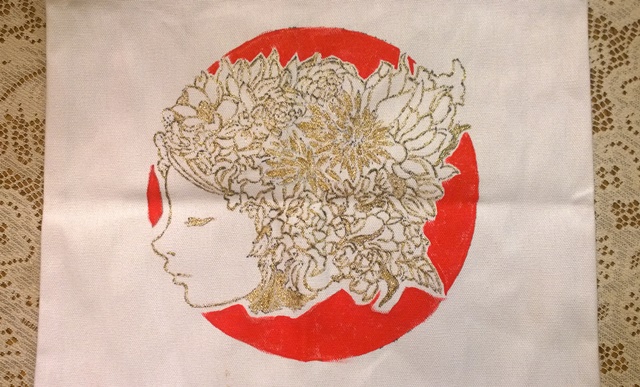
Of course I would have to make that missing bag, and so far, I have now completed two- Music for Relief’s classic logo and the gorgeous artwork for the secret show benefiting Japan back in 2011. Here’s a quick tutorial for the MFR Secret Show Design so that hopefully you’re inspired to rock your own!
Materials:
- white canvas tote (or make your own bag from canvas material)
- soft red fabric paint
- gold shimmer or metallic fabric paint (metallic preferred, shimmer used in tutorial)
- white tissue paper
- binder clips
- file folder (or anything flat and sturdy to paint on, to be inserted inside bag)
- pencil
- Sharpie (fine point and standard)
- paintbrushes (scrap towel) [See note below material list]
- scissors
- utility blade
- pliers
- screws (sharp tip, thin screw and another minimum two sizes larger in girth)
- screwdriver
- eyelets (11mm) (2)
- eyelet tool (for 11mm eyelets) and hammer
- D-rings (or other options) (2)
- swivel hook (2)
- a Linkin Park playlist to enjoy
- (white) Music for Relief guitar strap
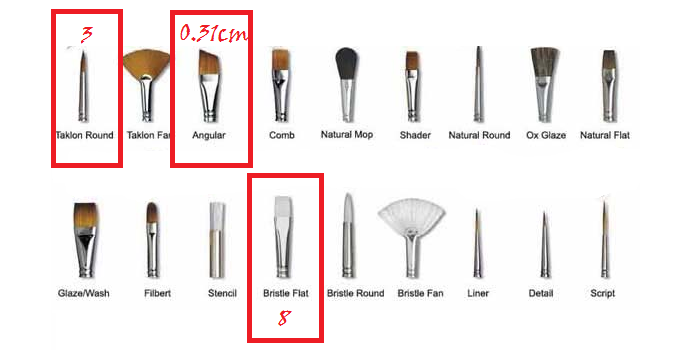
Paintbrushes: the finer the brush tip, the better. This design has extreme details, and you want to blotch the details as little as possible. The shorter the bristles, the better. The firmer the bristles, the better. You need absolute control of the brush. Do not buy expensive brushes! The gold shimmer paint will ruin the bristles easily, buy your brushes at discount! I used round and angle tips for details, flat for the red circle. Pictured are the types of bristle tips I used:
Not listed is a crafting spatula I have. It’s handle is thin at the tip, then widens, and I use it to widen the hole in the fabric for the eyelet. Find anything similar to use, like a standard Sharpie, even!
Part I: Tote and Eyelets
I can’t sew. Maybe if offered tacos for life, I could manage, but otherwise, I went ahead and bought plain canvas totes, cutting the straps. No need to mess with the hems, just cut as close to the hem line as possible.
The eyelets I chose are 11mm (7/16 in). Place the eyelet, to mark the center for creating the hole, as close to the top hem as possible. It’ll make interchanging the swivel hook a lot easier. Using a utility knife, puncture the center mark that will become the eyelet hole.
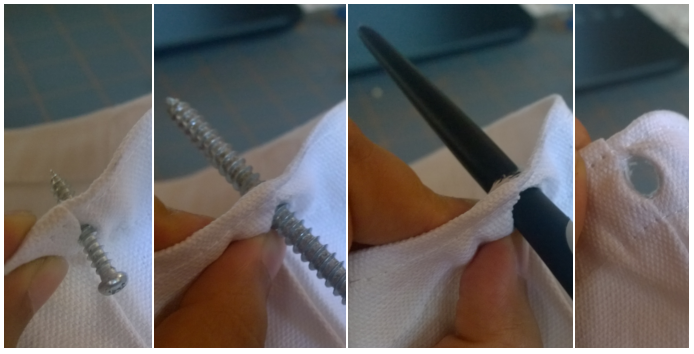
Once punctured, now insert your smallest screw, and use the screw driver to force part of the screw through the puncture. Remove and repeat with your larger screw. Then, like my craft spatula, use an item wider than the larger screw. Be careful of tearing the material more than needed! Widen bit by bit.
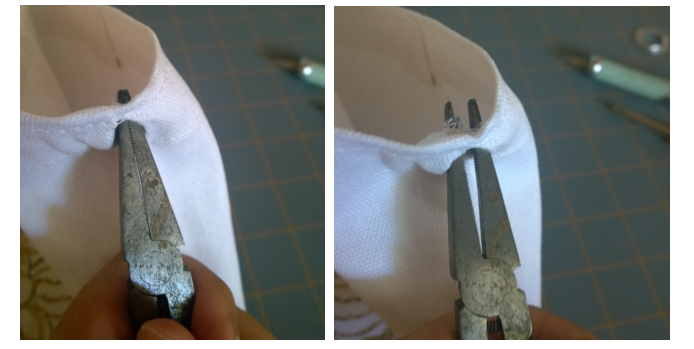
Next I used the pliers to slowly widen the hole more. Rotate and widen the pliers at vertical, diagonal, and horizontal points. Literally change position of the pliers at the first “tear” you feel in the material. Be careful of the hem lines!
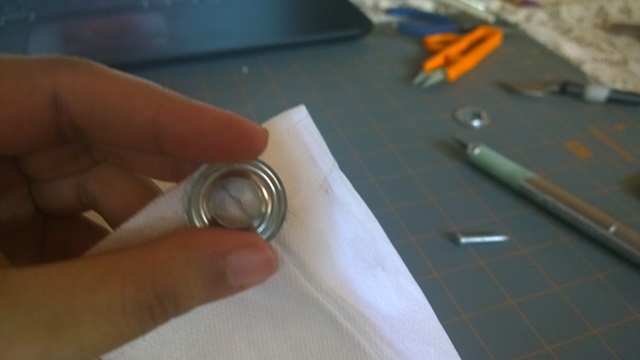
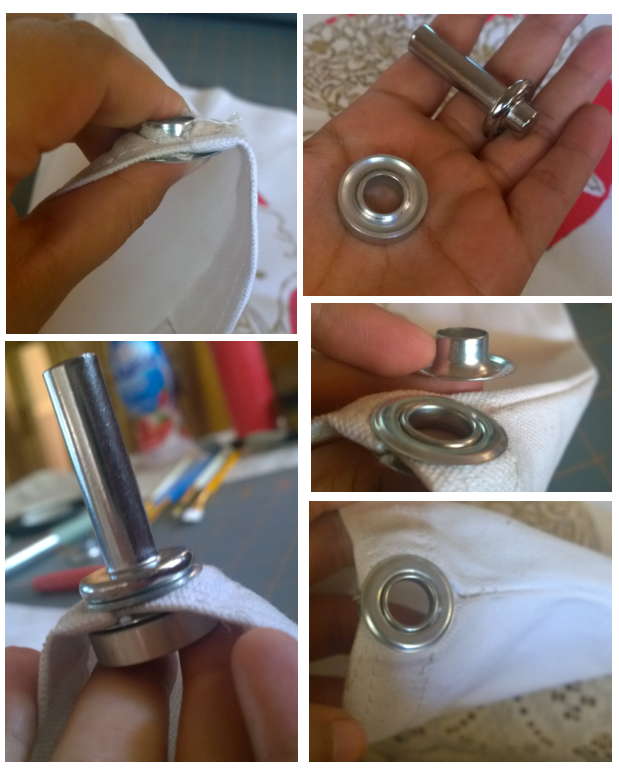
Constantly check whether your eyelet now fits. You can use the utility knife to cut at the hem just enough to widen at the bottom, away from the top hem. Once the eyelet fits, insert the eyelet barrel (the part without teeth) from inside the bag to the outside. Place washer (part with teeth) over the barrel, teeth down. On a hard, sturdy surface, position the bottom of the eyelet (inside the bag) on the eyelet anvil (part of your eyelet tool). Position the stud end of the eyelet tool in the barrel (outside of the bag). Hammer forcefully until the barrel is completely flatten and teeth have sunk in.
Repeat for the second eyelet!
Part II: The Design
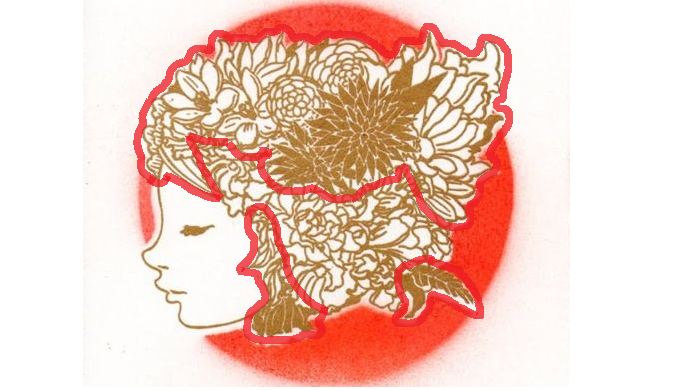
I am strongest in drawing what I see, so for the design, I was able to find a clear and detailed picture of her, HERE.
Don’t be intimidated by her details; even if you are not strong in drawing, try it. It will be yours. If it has to take you three days to draw her, do it. The sense of accomplishment when you’re done is worth it. I marked the areas I worked most in exactly replicating, the rest of the ‘headdress’ mainly freestyled (that’s what I’m telling myself for sucking at drawing it, ha).
[PS: I shamelessly dug through tupperware and plates to find one to fit the design. I cheated and traced the tupperware for the circle. You should, too.]
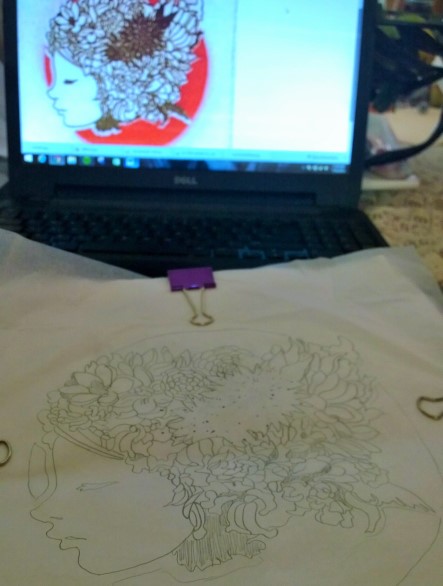
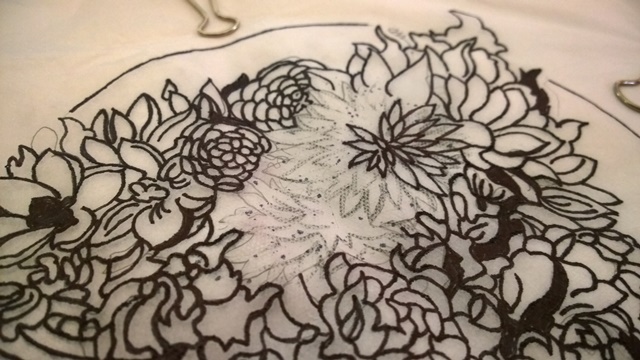
The design for this in particular couldn’t be drawn straight on the canvas material like I did with the black bag with Music for Relief’s classic logo. Too many times I had to erase and that wouldn’t have worked out so well on the bag. So draw her on tissue paper cut to the approximate size of your bag (it’ll be easier to center and clip down the design).
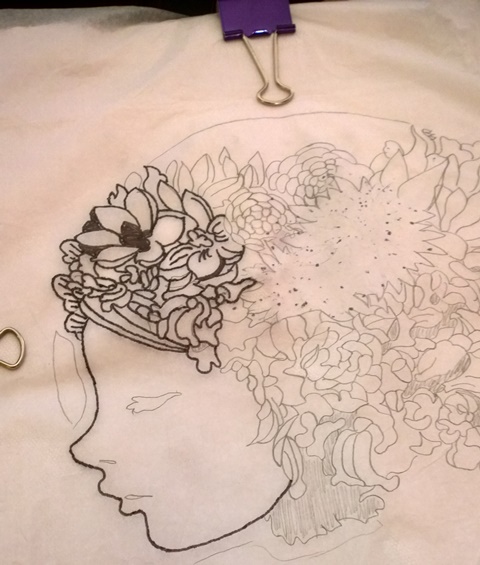
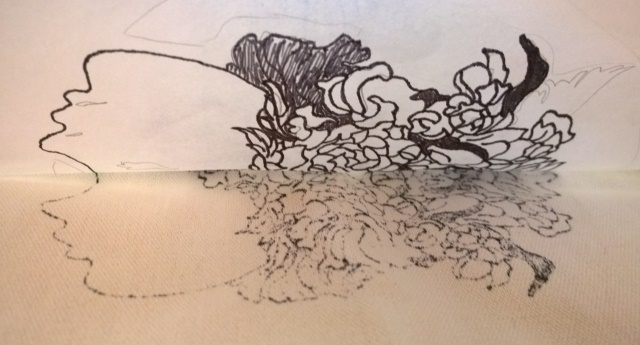
(I struggled with the solid flowers and added them later) Once you have the design drawn on the tissue paper and have her clipped down (or pinned) tightly in place with the paper touching the canvas (you might clip the paper too tightly, the paper slightly off the canvas. When you press down with the fine-point marker, you’ll break the paper), use a fine-point Sharpie to trace your drawing. Make sure you are able to fold back areas of the paper to check how your design is transferring. You don’t need the transferred lines to be solid, just dark enough for the details to be clear.
Once you are done transferring the design, carefully and slowly remove the tissue paper, making sure you have every area transferred well. If the design has transferred correctly- grab your paintbrushes! Time to start painting.
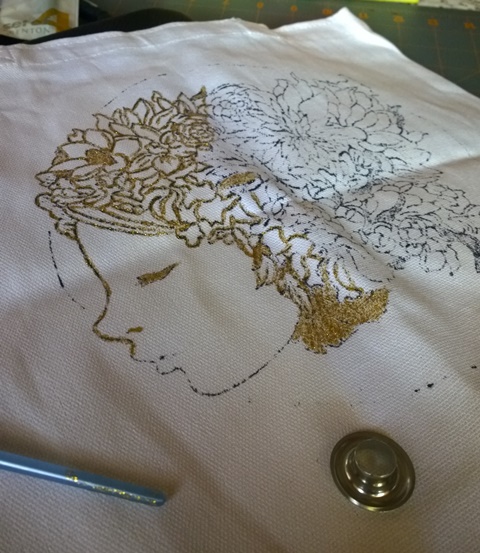
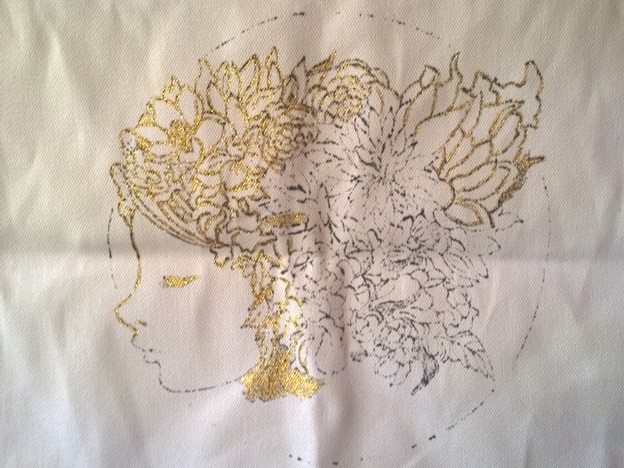
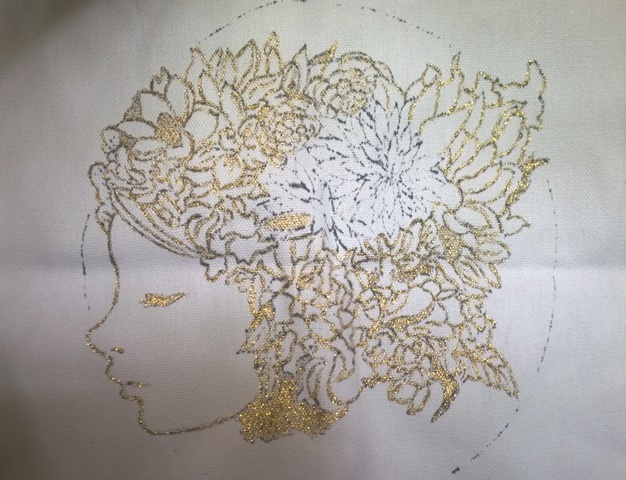
The red (and white, from my previous project) fabric paint I chose is considered “soft” and the gold fabric paint is “shimmer,” so it is rough in texture unlike metallic fabric paint. Using shimmer, you will have to constantly wipe your bristles clean of clumps and keep your shimmer paint covered as much as possible- it dries quickly and the glitter in it clumps! Painting the gold details took me three nights of tested patience. I switched between the round and angle tips, preferring the angle tip for the areas of the flowers I had marked above. You will make many strokes in a small area, and make sure not to “stretch” the shimmer paint; the black design lines will show more if you stretch the paint!
As for the lines, with shimmer paint, the gold is weak against the white canvas, so I did not try to cover it. If you want to work on completely covering the black lines, do it as you go. The rough texture of the paint will not make a second coating easy or neat.
For the solid flowers, I painted the black lines white to mostly cover them. I then painted in the solid gold, painting over the white lines as much as I can while still leaving enough to distinguish the different petals. You can, though, just leave the black lines to show. Up to you!
The red paint was thankfully left for last- have that flat folder inside to keep the paint from bleeding through!- so it was almost relaxing to finish with it. Note that some areas do not have much space between the red and the design. Like the white paint on my first bag, the red will need a second coating, but do try to make the first coating as solid as possible.
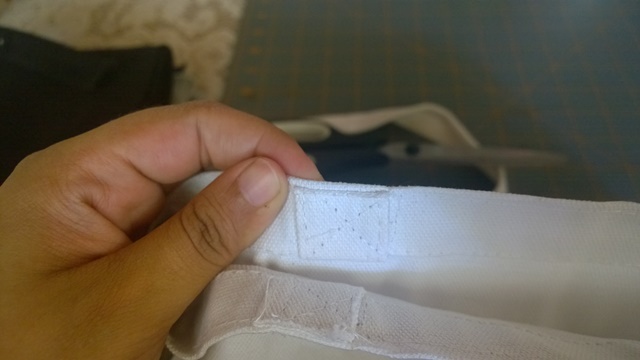
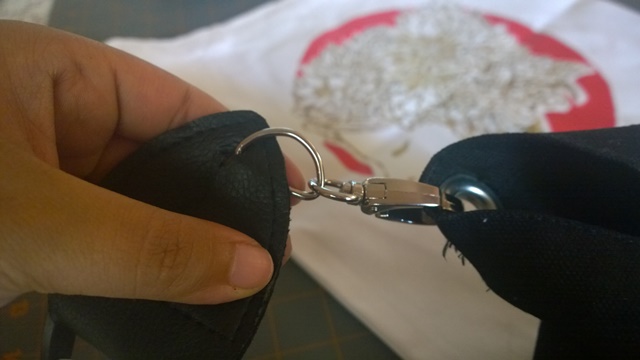
Now to finish- I use D-rings to attach each end of my Music for Relief guitar strap to swivel hooks; the swivel hook then clips to the eyelet. I recommend reinforcing the leather where the ring will rest with weight on the hooks, such as sewing a small patch of thread for the ring to rest on (which I will do myself once I am not so lazy to find brown thread).
BOOM. You now have your very own Music for Relief bag with a guitar strap to rock it. You, are Mike Shinodaly awesome.
(Have you decided “@#$% it!” after all? Find Music for Relief’s official bag HERE. You’re still Mike Shinodaly awesome.)

